Meat Glue – Lobster Hot Dog
The other day I Experimented with meat glue, aka transglutaminase, an enzyme that catalyzes the formation of a covalent bond between a free amine group (e.g., protein- or peptide-bound lysine) and the gamma-carboxamide group of protein- or peptide-bound glutamine. In plain English: something that glues proteins so you can make Lobster Hot dog
Here’s a better look of the infamous lobster hot dog with Claw intact:
The cool thing about making a lobster hot dog is the ease in cooking it! If only nature shelled out amazing perfect cylinder shaped proteins it would make our job much easier to achieve the perfect sear, evenly distributed heat to perfection.
For this experiment I purchased 3 live lobsters from the H-Mart at only $5.99/lb! This is for reals people! Go right now and look it up on google!
So I buy the lobsters and I use the best method to kill a live lobster: Become a Lobster Anesthesiologist! Check out the cooking issues primer on exactly how to do this by clicking on the lobster hot dog claw pic above
I decide I want to use meat glue to achieve a perfectly cylinder shaped lobster protein. My deiscion to do this stems from the fact that I have over 2 pounds of meat glue in my freezer! True story. If anyone of my readers wants a sample please feel free to email me directly at molecularfood@gmail.com. Ok, back to exactly how I did this.
Step 1: Place knocked out lobster in boiling salt water for about 4 min.
Step 2: Take lobster out and ice bath to stop cooking.
Step 3: Take meat out of shell.
Step 4: Prepare a meat glue slurry consisting of 1 part meat glue to 4 parts water.
Note: I use 4 teaspoons of lukewarm water to 1 teaspoon meat glue.
Step 5: Cut lobster meat
Step 6: Brush meat glue slurry all over lobster meat
Step 7: Get cling film (plastic wrap) and prepare to roll lobster meat/meat glue mixture into a hot dog shape.
Wrapping in Plastic Wrap:
Rolling foods in plastic wrap is an excellent preparation technique for low temperature cooking. Rolls cook evenly and are easy to portion. We often combine rolling with some meat glue. Properly rolled roulades in plastic wrap will not allow water to penetrate. Really good rolls are dense –they will sink. Remember –making good rolls isn’t as easy as it looks.
Step 8: Put rolled lobster into a vacuum bag and sous vide.
Step 9: Sous vide for 10min at 95C
Step 10: Remove from water bath and ice bath.
Step 11: Refrigerate overnight.
Step 12: Remove from vacuum bag and unroll the lobster hot dog.
Step 13: Serve whole or slice into small 1in cylinder shapes.
Step 14: Prepare a paprika chili butter mixture.
Step 15: Sear lobster in butter until warm
Serve with brioche bread that is toasted in duck fat and topped with brie cheese. Also serve with lobster consommé, fig jam, and maple bacon.
Here’s a picture of how it looks
Molecular gastronomy – oil and viscosity
Hello everyone,
It’s been awhile since I’ve posted material here on molecular gastronomy. I’m happy to announce that my absence was based on my recent trip to visit Molecular Chefs Jose Andres and Masterchef Ferran Adria!!!
I learned way too much and can’t wait to share with you ALL!
Another great piece of news I’ve got is my new molecular kitchen device.
Here is my new Toy: The Thermomix
Now to bore you with the MAD food science I learned while away. FYI, there are some great recipes past the science if you want to just scroll down. Enjoy!
Oil and viscosity
Molecular viscosity : v = l x c
elasticity: E = kBT/l³
When talking about the elasticity you got to imagine a spring. Imagine how the spring stretches and you will obverse its elastic constant. What makes foods soft, squishy or flow easily is critical to all aspects cooking. It is for this reason that we must examine the properties of elasticity and viscosity when dealing with food.
Here is an example of the elasticity of a raw thaw steak:
Elastic constant of a steak
E = F ⁄ A L ⁄ ΔL
E= 8,000 Pa
The amazing formula is as follows:
E =kT ⁄ l³
Elasticity / / (volume)
Before Cooking (RAW) 8×10³ Before 8.1 nm Before 8.1 nm
After Cooking (Cooked) 5×10⁴ After 4.4 nm After 6.8 nm
The stiffness of a material depends on the length between bonds .
Energy of bonds times their density
Stretching bonds to deform the solid
Units – Energy density
Viscosity
A material is a liquid if the molecules can move around each other
The fundamental quantity that governs this is the time that it takes for molecules to move around their neighbors.
If it takes a long time to move by each other, the material is very viscous.
If it takes a short time, the material is less viscous.
Example: Olive Oil
It takes longer for the molecules to move through olive oil than water because it has a higher viscosity.
Molecular viscosity
length²/time v = l x c
where v = length
c = length ⁄ time
Very important Equations:
Molecular viscosity: v = l x c
elasticity: E = kBT ⁄ l³
Let’s look at the viscosity of hot oil
Hot oil flows faster than cold oil
Viscosity decreases with increasing temperature
Molecules move around each other more easily
Let’s look at how using a thickener helps make liquids thicker
Xanthan Gum makes liquids thicker
Xanthan Gum (E415): makes food thick and creamy; also stabilizes foods to help solids and liquids stay together
You could see Xanthan Gum is sauces, low fat or non-dairy, and dressings.
The reason thickeners works?
Thickener is a polymer
Polymer forms network in the water
This forms a solid gel
Note: The bonds in gels are not permanent
Molecules can move
Molecules must disentangle to move
This is important because it means if you form a gel you could easily manipulate it by shredding it in a thermomix or blender.
doing this will change the viscosity by either a small percentage or a large one.
Let’s get into some recipes with some molecular ingredients:
Soft Creamy Jelly
You will need:
100g of water, fruit juice, or wine.
2.5g iota
100g of olive oil (extra virgin)
Procedure:
You will need to bring water to boil and stir in iota, whisking constantly. Take the saucepan out of the warmer and slowly add the olive oil, stirring constantly.
Pour mixture into molds and allow to cool.
Once it has set you could slowly remove the olive oil jelly from the mold
Finally, serve on bread with tomato and jamon iberico.
For the next recipe you will make Olive oil gummie bears
You will need:
150 g extra virgin olive oil
7.5g xanthan gum
7.5g locust bean gum
310g glucose
160g sugar
10g water
For the procedure you will need to use your thermomix at speed 3, veroma 100 C for 5min. Mix all ingredients.
Once the mixture is complete transfer to piping bag and pipe little goblets over cornstarch.
Completely cover with a thin layer of cornstarch.
Molecular Gastronomy – Carrageenan Kappa and Iota
I’m back with some awesome molecular gastronomy adventures. Today I want to take you into the world of the Carrageenan. What are carrageenans? They are composed of a linear polysaccharide made up of galactose units with sulfur side groups. The origin of carrageenans are red seaweeds. There are several types of carrageenans such as, kappa, iota, and lambda. I’m going to focus on Kappa and Iota carrageenan for this post and share an awesome molecular gastronomy recipe.
A short introduction to Carrageenans:
Natural Carrageenans occur in a mixture of kappa, iota, and lambda types. Note that manufactures desperately try to separate the various types as best as they could, nevertheless; total separation is impossible. Carrageenans also vary from mixture to mixture, therefore; they are standardized for a particular application. Note: when specifying for a carrageenan make sure to tell the manufacture whether you will be using it for water based system or milk based system. Carrageenans are most often used in milk based applications due to the fact that are effective at very low concentrations. For example, gels can form at .3% in milk.
The Kappa and iota carrageenan can be mixed to obtain intermediate textures. Kappa carrageenan shows a great combination with the thickener locust bean gum. By combining these two together you get a stronger, less brittle, more cohesive, and less prone to break. I’ve found that the strongest and best ration is 6 parts kappa carrageenan to 4 parts LBG. Kappa-LBG mixes are often used to substitute for gelatin and make for a great vegan friendly dish.
You use Kappa carrageenan by dispersing it in water or milkl under shear and heat until completely dissolved (usually above 60C). Kappa-LBG mixes need to be brought almost to boil to become fully functional, but will set and re-melt at lower temperatures. Solutions up to 3% can be made using cold water dispersion. Solutions up to 8% can be made if the carregeenan is dissolved directly into very hot water under high shear.
Typical usage is .75% to 1% in water, and .35% to .5% in milk.
Kappa Carrageenan is used mostly to gel mixtures – it is the most like agar in behavior. The gel type is thermo-reversible with a texture that is firm, strong, and brittle. Gel temperature increases with ion concentration, with values ranging from 40C – 70C. The setting factor is very fast with a PH tolerance down to pH 3.6 if boiled, lower is not over heated. Moreover, the kappa carrageenan is not freezer stable and has an ion sensitivity when potassium salts are not present. Kappa also forms gels at very low concentrations with milk and the flavor release is good.
Iota Carrageenan is used mostly to gel mixtures – it is more rubbery in texture. The gel type is thermo-reversible with an elastic and cohesive texture. The gel temperature increases with ion concentration, with values ranging from 40C – 70C, and has a fast setting time. Iota is freezer stable and has an ion sensitivity in the presence of calcium or potassium. Once you shear Iota a gel will form and be loaded with a flavorful release. Moreover, iota forms gels at very low concentrations with milk.
Carregeenan Recipe
Vegetarian Marshmallow
27.5 g Cornsyrup
275g Fine Sugar
2.5g Lactose (milk sugar)
12.95g Water
.5g Versawhip
28g Hi Fructose Corn Syrup
1g Genutine x-9303 Carrageenan
Combine in mixer with mixing attachment and mix until you get fluff. Next pour into marshmallow molds (or ice molds) and allow to set. Once set, powder in confectioners sugar and serve.
Enjoy your explorations with the Carrageenan and look for more molecular gastronomy recipe posts coming soon.
Molecular Gastronomy – Xanthan Gum
Welcome back to my Molecular gastronomy blog. I’m glad to say that I’m back with some great content for the molecular gastronome out there. Today, I’m going to write about the hydrocollid xanthan gum and introduce a recipe for your enjoyment.
Xanthan Gum:a brief description
Xanthan gum is a linear polysaccharide made of a cellulose backbone units with trisaccharide side chains. It is produced by fermentation of glucose or sucrose by the Xanthomonas campestris bacterium. It is used as a thickener.
Xanthan gum is amazing because it’s very user friendly: Xanthan gum works on any temperature and can be added to sauces without weighing. Pay attention to what amount works best for you.
How to use xanthan gum in your moelcular gastronomical kitchen is by simply dispersing it into hot or cold liquid under a shear. Typically you only want to use between .2% – 1%.
The solution type is shear thinning, a pseudoplastic, that exhibits an effect where viscosity decreases with increasing rate of shear stress. In high levels, xanthan gum can give food a very thick, almost mucus-like, consistency. PH tolerance: high. Also, xanthan gum is highly stable when frozen and thawing. The best part is xanthan gum works well with other hydrocollids (Lotus bean gum, Kappa Carrageenan) and even versawhip!!!
Note: Combining xanthan gum with other hydrocollids creates a synergistic chemical reaction that will take your molecular gastro cuisine to a higher level.
RECIPE: Cupuacu Foam with Tonka Bean
Ingredients:
Almond milk 100g
Cupuacu powder .7g
Sugar: 40g
Tonka Bean: .3g
Versawhip: 2g
Xantan Gum: .5g of Texturas Brand
Procedure:
Combine all ingredients except for the xanthan gum into the vita-mix. Mix on high until you get a nice funnel in the middle of the vita-mix. Slowly pour in xanthan gum into the funnel until mixture starts to thicken.
That’s it for now. Stay tuned for when I break down the Carrageenans Kappa and Iota.
Molecular Gastronomy – Agar agar
Molecular gastronomy is back and ready to dish out more advanced and novice molecular based gourmet recipes. I want to start with a primer of sorts: something to introduce the topic of discourse before we start to deconstruct. For this post we will be focusing on the hydrocolloid: Agar.
Agar: a brief description
A linear polysaccharide made of glaactose units. Agar is a red seaweed and its function is for Gelling (but I will show you a recipe for “cold-oil spherification.”
Agar is very similar to carrageenan but lacks the sulfate groups found in carrageenans. Agar is very adaptable to high heat and is often served hot and allowed to gel while cooling. To use agar in “cold-oil spherification” drop liquid agar at a temperature of roughly 45-50C into a bath of cold oil.
How to use: Disperse in a cold liquid and heat while stirring until completely dissolved. The target temperature for this to occur is about 90C or above.
You will expect to use about .5% to 1% in your recipes
To make a fluid gel: Make an agar gel in the range of .6%-1.2% and shred in blender until a smooth consistency is reached. You could thin out the gel by adding more liquid or you could thicken the mixture by adding some xantham gum. Could be served hot (but never to boiling).
Gel type: thermo-reversible: Thermo reversible gels melt when heated to a high enough temperature. Texture: firm, strong, and brittle. Gel Temperature: Approx 35C. Setting: Very Fast. PH tolerance: very good except for the fact that keeping acidic solutions heated for a long time will cause the agar to break down. Freezer stable: No. Flavor Release:Good.
Note: you could solve the issue of keeping acidic solutions hot, and thereby causing your agar to weep, by adding some more ascorbic acid to your solution to balance things out.
RECIPE
Blackcurrant and ginger fluid gel sauce
INGREDIENTS:
100g Simple Syrup
500g Blackcurrant puree (I use The Perfect Puree from Napa Valley)
30g ginger juice
pinch of salt
6.3g of Texturas brand Agar(.8%)
EQUIPMENT
Blender, Scale
PROCEDURE
1: Add simple syrup to the blackberry puree until you reach a desired sweetness
2: Add ginger juice
3: Add salt
4: Weight blackcurrant mixture and place in a pan with .8% by weight agar. So if total is 780g, use .8% of 680g which will give you approx 6.34g
5: Bring mix to a boil, then reduce heat and let simmer for 2min. Lower heat and stir to dissolve the agar.
6: When agar is fully dissolved, pour into plate to chill.
7: Take the chilled gel and place it in the blender. Blend until smooth.
That’s it for now. Feel free to ask me questions. Stay tuned for more molecular gastronomy!!!
Molecular Gastronomy – Goji caviar tiny spheres
So today I decided to make goji caviar. I really wanted to just make a sphere out of a regular dried up goji berry. So, what I needed for this recipe/experiment was 1.8 g sodium alginate, 1.3 calcium citrate, and 6.5 calcium chloride. The first step was to prepare the goji mixture. For this, all I did was simply blend 500 g of goji berries in my vita-mix. The end result was 250 g of goji pulp (after passing the mixture through a chinos).
Next, I blended the calcium citrate with 250 g of water and added the sodium alginate until blended well. i placed this mixture in a saucepan and heated it up until boil constantly stirring. I allowed the mixture to cool at room temperature and once cold I added the goji puree and mixed.
For the Calcium chloride bath I mixed 1000g of water with 6.5 g of calcium chloride. I placed the mixture aside and kept it ready for the goji mixture.
Molecular Gastronomy – Coconut milk ice gelatin
By Chef Tali Clavijo
Today I started a quest to make a liquid I really love into a gelatin that is frozen cold. How could I do this? Is it even possible to have a frozen gelatin? Can I do this without using any animal products, and make it vegan friendly? I really enjoy one liquid more than anything in the world…Coconut milk!
I just love raw coconut milk. I love making it and love tasting it in various forms and textures. So, after I made some of my world famous coconut milk (e-mail me for the recipe at molecularfood@gmail.com) I started to get ready for the coconut gelatin ice experiment.
For this recipe all I used was 500 g coconut milk, 250 g water, 36 g powdered coconut (dehydrated and graded), 200 g of sugar, 9 g sodium alginate, 2.4 g of calcium gluconolactate, and other 50 g of water.
After I made my 500 g of fresh raw coconut milk I put it in a saucepan along with the powdered coconut and 250 g of water to a heat of 70 ºC.
Once the mixture reached 70 ºC I added the sugar and the sodium alginate and stirred, then added the calcium gluconolactate.
After I added all of the ingredient, I took the mixture off of the heat and added the remaining 50 g of water.
After I took off the heat I stuck it in the fridge and allowed to rest for 3 hours.
After 3 hours I took out the mixture and placed in my vita-mix
I blended for about 2 min until the mixture was smooth
I transferred the mixture to a mold and placed it in the freezer for about 12 hours
After 12 hours, or overnight, I took out the mold and got ready to place the final coconut gelatin serving
The final result
Serving suggestion:
Molecular Gastronomy – Transformation walnut dust biscuits
By Chef Tali Clavijo
so today I felt like making something sweet and powdery. I’m just fascinated by fine powders and what better powder than tapioca maltodextrin? The ability for ‘malto’ to transform oils into powders is like a super power that only heroes are granted access too. Maybe someday I too will be able to turn fat into a fine powder…until then I will be making food that is amazing.
So, for this recipe I needed about 60 g of ‘Malto’ (tapioca maltodextrin), 145 g of walnut oil, 2.3 g of salt, and about 40 g of walnuts (I smoked mine in sugar, but you could use raw walnuts for this too).
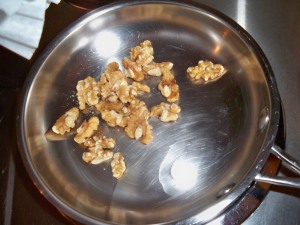
I started by pan steaming my walnuts with some sugar for about 10 min on medium. Then I placed them aside.
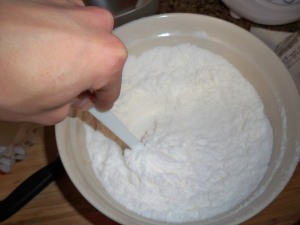
Next, I measured out 60 g of ‘malto’ and added the walnut oil to the mix. I then added the salt to this mix and used a spatula to mix until the mass was even
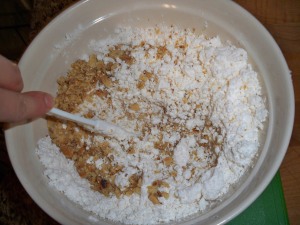
Next, I combined the pan steamed walnuts (I did crush the walnuts to make them powdery) to the malto walnut oil and salt mixture.
I mixed until the mixture was even. Next, I spread the mixture to a thickness of 1 cm.
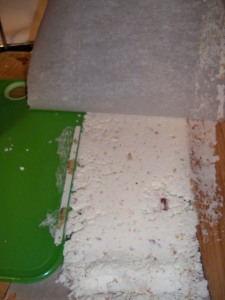
this process requires you to get two even leveled surfaces (about 1cm in height). Next, I covered the mixture with parchment paper and used my rolling pin to smooth out the surface of the walnut dust biscuit.
Once I rolled it enough I got a beautiful walnut dust biscuit.
Next, I cut with a circular pasta cutter
You could also just use a knife to cut shapes on the biscuit.
Final presentation :
Enjoy, and feel free to send me any questions, pictures, or other goodies to molecularfood@gmail.com
Thanks again,
Chef Tali Clavijo
Molecular Gastronomy – Emulsions Shriek hemp butter
By Chef Tali Clavijo
So today I decided I wanted to experiment with converting liquid oils into solids. How was I going to preform this experiment? Well, I decided to use the monoglyceride flakes from the ‘Texturas” line called Glice. These flakes are obtained from glycerin and fatty acids. Similar to oil, it must be broken down with a fatty element and then allowed to emulsify.
The monoglyceride flakes look like this
For this recipe I simply measured about 100ml of hemp oil and 6g of Glice
After I measure out my ingredients I simply combined them in a saucepan
and warmed up the oil until the monoglyceride flakes completely dissolved into the oil. This happens at around 65ºC. Your new mixture should look like this
Next, I transferred my mixture to a different container and placed it in a bath with ice stirring constantly until the oil begins to take body.
Once the oil began to take form, I stuck it in the fridge for about 12hours, or until it acquires a texture that can be worked with the spatula.
The final hemp butter could be used as a spread and tastes amazing!
look at how it spreads…totally transformational!
Feel free to ask me any questions at molecularfood@gmail.com
Your friend,
Chef Tali Clavijo
Molecular Gastronomy – Suprises crispy honey
By Chef Tali Clavijo
So I decided to make crispy honey today. This was achieved by simply combining maltodextrin, sodium alginate, and some natural honey (60%). Note: for the recipe please e-mail me at molecularfood@gmail.com.
After I got the honey mixture together it looks something like this:
At this point the honey crisp mixture is just like sand so you will have to shape a layer with your hand. I placed my mix on the parchment paper and then I stuck it in the oven (275 F) for approximately 10 min.
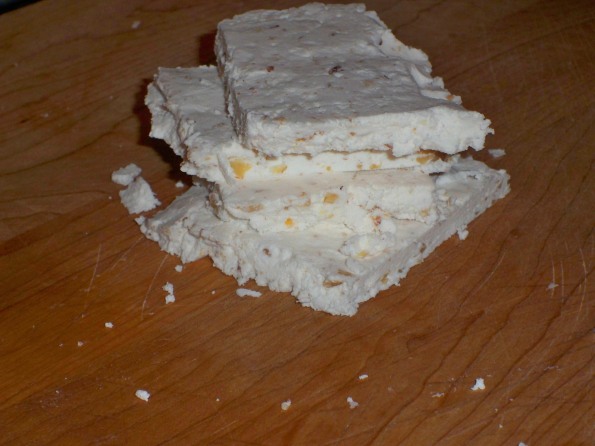
After 10 min I took the honey crisp out of the oven and allowed it to cool for another 10 min. The difference in the mixture, another molecular gastronomy masterpiece.
Once you allow the honey crisp to cool down and harden. You could easily just start to rip pieces out of the parchment paper and start getting creative.
Final presentation.
Honey crisp panna cotta house


